Instructions
To Log into the WordPress back-end, visit http://localhost:8888/muse/wp-admin/ and enter your username & password.
Blog Posts
Posts are the content appearing in the Stories section of the website. You can add, update and delete posts – which you can read more about below.
Add a Post
- In the back-end of WordPress, hover over Posts in the left hand column and click on Add New.
- Alternatively, you can click on Posts in the left hand column, and then click the Add New button at the top of the page.
- Enter a Title, Post Content, a Featured Image (if needed), Categories and click Publish in the top right.
- Complete the following fields:
- Featured – Upload an image
- Title —
- Link —
Update a Post
- In the back-end of WordPress click on Posts in the left hand column, and then click the title of the Post you’d like to update.
- Update the Title, Post Content, a Featured Image (if needed), Categories and click Update in the top right.
Delete a Post
- In the back-end of WordPress click on Posts in the left hand column, and then hover over the title of the Post you’d like to update.
- Click on the Trash link that appears below the title.
- To undo a delete, click on the Trash link above the list of Posts, find the post you’d like to restore and click the Restore link.
- Alternatively, you can delete a post by viewing the edit page for the specific post, and clicking Move to Trash in the top right, next to the Update button.
Activities
Activities are custom content pertaining to performances and productions.
Add an Activity
- In the back-end of WordPress, hover over Activities in the left hand column and click on Add New.
- Alternatively, you can click on Activities in the left hand column, and then click the Add New button at the top of the page.
- Complete the fields provided in the main content area as well as the Activity Details and the Activity Types in the right hand sidebar.
Update an Activity
- In the back-end of WordPress click on Activities in the left hand column, and then click the title of the Activity you’d like to update.
- Update any of the fields in the main content area and sidebar.
Delete an Activity
- In the back-end of WordPress click on Activities in the left hand column, and then hover over the title of the Activity you’d like to update.
- Click on the Trash link that appears below the title.
- To undo a delete, click on the Trash link above the list of Activities, find the activity you’d like to restore and click the Restore link.
- Alternatively, you can delete an activity by viewing the edit page for the specific activity, and clicking Move to Trash in the top right, next to the Update button.
Activities In More Detail:
Excerpt:
On pages where you pull in specific activities to a landing page (e.g., Student Activities), you can add a custom excerpt to each Activity which gives you complete control over what text is displayed on those pages. Excerpts are limited to 60 words. If no excerpt is provided, content will be pulled from the body content field.
Gallery:
Within the Body Content field, you can add a photo gallery by clicking the ‘Add Media’ button. Once the gallery appears, click the ‘Create Gallery’ tab and select the images you’d like within the gallery. Images should be at least 940 x 560 px to ensure photos appear crisp on the screen.
Sidebar:
- Activity Types – Select at least one of the Activity Types listed as this is used to sort and classify activities throughout the website.
- Tags — Add a new tag or select from the existing tags. These are used to provide more detailed categorization of an activity (ie., Dance, Opera, Theatre, Concert, etc)
- Activity Details — If Ticket Disabled is checked, this will make the link unclickable to the user.
- Display Dates — this is a date field that must be entered manually and will appear on the front-end of the website. You can provide a date range (July 6 – July 20), a single date (July 6), or a list of dates (July 6, July 9, July 12). Please be sure you remain consistent with your naming convention.
- Start Date — this is for sorting purposes only. A start for all activities is required as this indicates what activities belong in “Past Productions” as well as helps organize other activities.
- Featured Image — Be sure to upload a featured image for each activity since this will be used in various places throughout the site.
Lesson Plans
Lesson plans consist of a typical tagline area and a text editor in the main content area. In the sidebar, select the lesson plan types and upload a featured image.
Add a Lesson Plan
- In the back-end of WordPress, hover over Lesson Plans in the left hand column and click on Add New.
- Alternatively, you can click on Lesson Plans in the left hand column, and then click the Add New button at the top of the page.
Update a Lesson Plan
- In the back-end of WordPress click on Lesson Plans in the left hand column, and then click the title of the Lesson Plan you’d like to update.
- Update any of the fields in the main content area and sidebar.
Delete a Lesson Plan
- In the back-end of WordPress click on Lesson Plans in the left hand column, and then hover over the title of the Lesson Plan you’d like to update.
- Click on the Trash link that appears below the title.
- To undo a delete, click on the Trash link above the list of Lesson Plans, find the lesson plan you’d like to restore and click the Restore link.
- Alternatively, you can delete a lesson plan by viewing the edit page for the specific activity, and clicking Move to Trash in the top right, next to the Update button.
Adding a New Lesson Plan Type
- If you need to modify the lesson plan types, you can click on the Lesson Plans in the left hand column and click on Lesson Plan Types.
- In the right hand column, enter a name for the lesson plan (slug, parent and description fields do not need to be changed). A featured image should also be added.
- Click the Add new Lesson Plan Type button.
- This option will now be available in the right hand sidebar of each individual lesson plan.
Shops
Add each shop item that you’d like to include in this area.
Add a Shop
- In the back-end of WordPress, hover over Shops in the left hand column and click on Add New.
- Alternatively, you can click on Shops in the left hand column, and then click the Add New button at the top of the page.
Update a Shop
- In the back-end of WordPress click on Shops in the left hand column, and then click the title of the Shop Items you’d like to update.
- Update any of the fields in the main content area and sidebar.
Delete a Shop
- In the back-end of WordPress click on Shops in the left hand column, and then hover over the title of the Shop Item you’d like to update.
- Click on the Trash link that appears below the title.
- To undo a delete, click on the Trash link above the list of Shop Items, find the lesson plan you’d like to restore and click the Restore link.
- Alternatively, you can delete a Shop Item by viewing the edit page for the shop item, and clicking Move to Trash in the top right, next to the Update button.
Pages
Add a Page
- In the back-end of WordPress, hover over Pages in the left hand column and click on Add New.
- Alternatively, you can click on Pages in the left hand column, and then click the Add New button at the top of the page.
Update a Page
- In the back-end of WordPress click on Pages in the left hand column, and then click the title of the Page you’d like to update.
- Update any of the fields in the main content area and sidebar.
Delete a Page
- In the back-end of WordPress click on Pages in the left hand column, and then hover over the title of the Page you’d like to update.
- Click on the Trash link that appears below the title.
- To undo a delete, click on the Trash link above the list of Pages, find the page you’d like to restore and click the Restore link.
- Alternatively, you can delete a page by viewing the edit page for the specific page, and clicking Move to Trash in the top right, next to the Update button.
Pages with Specific Templates
The following pages have specific templates that will generate different fields and layouts. To modify the template, open your page and go to the Page Attributes bar in the right hand column. Under Template, click the appropriate template. Note: most pages will use the Default Template.
- Instructions Template – Instructions page
- Contact Template — Contact page
- Schools Template — Schools page
Content Blocks
Pages come with various content blocks to give you the flexibility to choose how your pages and content look. To add a content block, click the Add Row button under the Page Fields subhead.
Text Block
- Column — Choose from either a full-width column that spans the entire page or a 2 column layout
- Subhead Type (optional) — If you would like a subhead, select either Primary Subhead (purple h2) or a Secondary Subhead (green h3) from the dropdown menu
- Text Area — Enter your content in the text editor
Page Links
- Title — Provide a Title for the page link
- Page Links — Select which pages from the list you’d like to link to. The title and featured image of the selected pages will automatically be populated on the front-end of the site.
Affiliate List
- Title Type — select either Primary Heading (purple h2) or a Secondary Heading (green h3) from the dropdown menu
- Title — Enter a Title for the list
- List Type — Select either Images or No Images from the dropdown menu.
- Affiliate — Either upload images (if you select Images from the list type), or provide the name and website url of the affiliate.
Blog Post List
- Title Type — select either Primary Heading (purple h2) or a Secondary Heading (green h3) from the dropdown menu
- Title — Enter a Title for the blog post list
- Intro Text — Enter some Intro text into the textarea
- List Size — Choose Small, Large, or Single.
- Post Type — Choose the type of post type
- Excerpt Type — Choose short or long excerpt. Short excerpts are limited to 20 words and long excerpts are limited to 60 words and include a ‘Learn More’ button.
- Blog Posts — Select which posts you’d like to display. This list will be sorted based on your ‘Post Type’ selection.
Activity List
- Title — Enter a Title for the activity list
- Intro Text — Provide some introductory text in the textarea
- List Size — Choose from Small or Large
- Activity Type — Select from the different activity types
- Workshops — provides a list of activities tagged as Workshops
- Performances — provides a list of activities tagged as In-School, Out-of-School or Muse Production
- In-School Performances — provides a list of activities tagged as In-School
- Out-of-School Performances — provides a list of activities tagged as Out-of-School
- All Shows and Performances — provides a list of all activities
- In School — Select the activities you’d like featured
Large Numbered List
- Hide Content — If you’d like the list to only show the header when the page loads, click this button. When the user clicks the header, the rest of the content will drop down.
- Title — Enter a Title for the list item
- Text — Provide text for the list item.
- Add List Item — Click the Add List Item button to continue to add more list items
Testimonial
- Text — Enter the testimonial text
- Name — Provide the name for whom the testimonial can be attributed to
- Title — Enter a Title for the person who has provided the testimonial
- Photo — Upload a testimonial photo
- Background Image — Upload a background image
Taxonomies
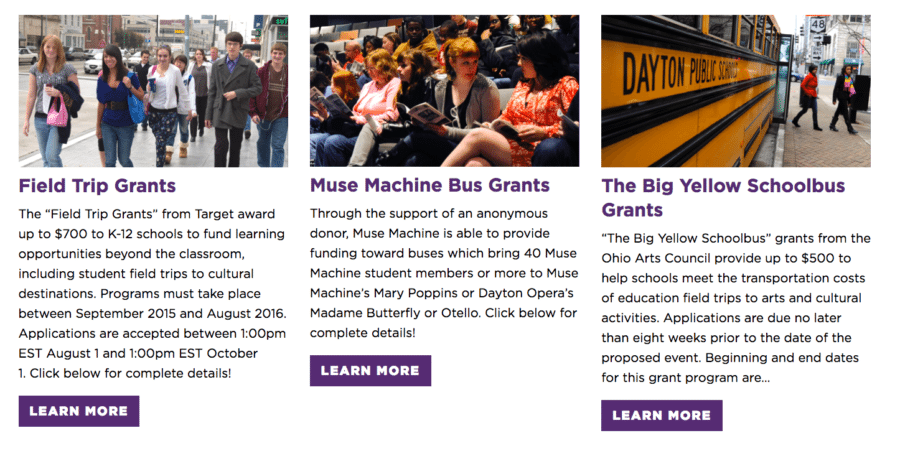
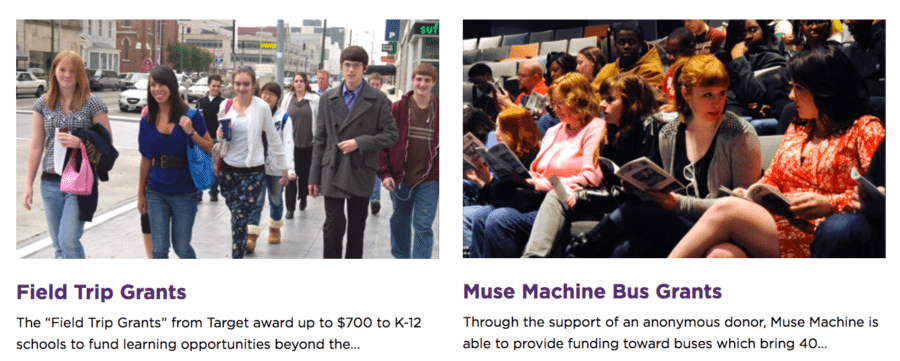
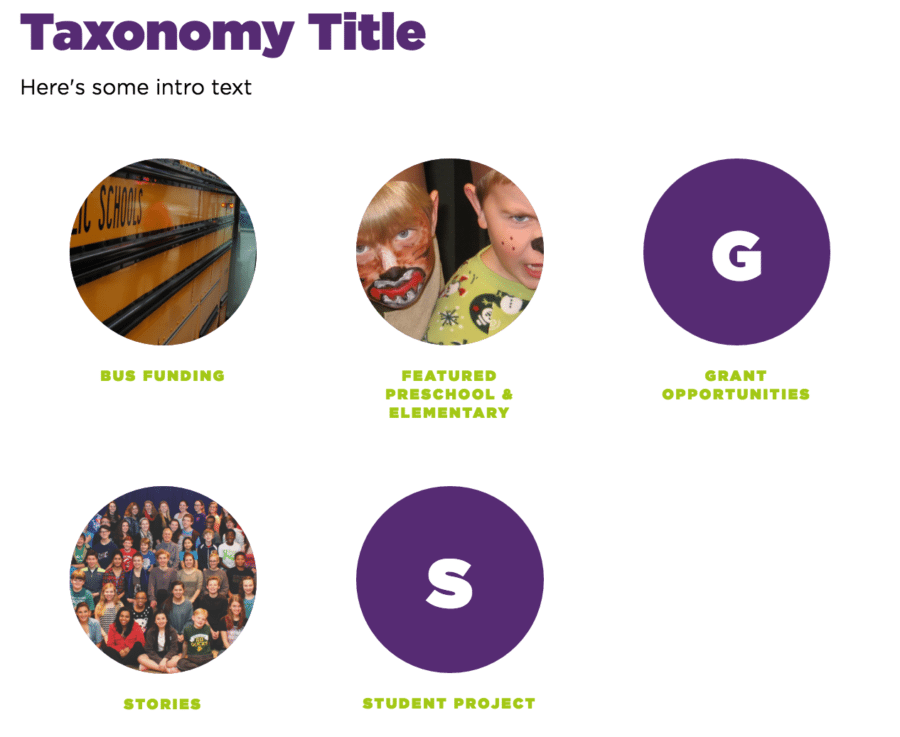
Taxonomies allow you to display specific categories (grant opportunities, stories, bus funding, etc.).
- Title Type — select either Primary Heading (purple h2) or a Secondary Heading (green h3) from the dropdown menu
- Title — Enter a title for the section
- Intro Text — Provide some introductory content
- Taxonomy Type — Choose the type of taxonomy you’d like to display
- Activity Taxonomy — Select multiple taxonomies to display
NOTE: The images that appear in the example below are images that are uploaded based on the taxonomy type you choose. For example, if you choose to display lesson plan taxonomies, click on the Lesson Plans tab in the left hand column. Then click Lesson Plan Types and select each taxonomy. Upload a featured image for each taxonomy type.

Circle Blocks
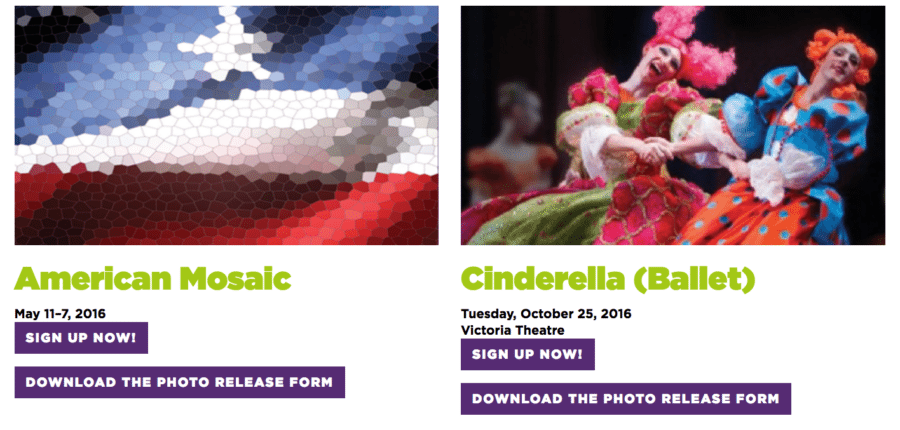
A similar look to the Taxonomies show above, the circle blocks allow you to manually add blocks of content.
- Image — upload an image
- Title — provide a short title
- Link — select from one of the internal pages/posts
Shop Items
Choose which shop items (from the Shops tab) that you’d like to include on this page.
Options
The options section is general, site-wide information. To access, click the Options tab in the left hand column in the admin area.
- General — Complete the fields pertaining to general Muse information
- Footer – this is information regarding the logo/assets page.
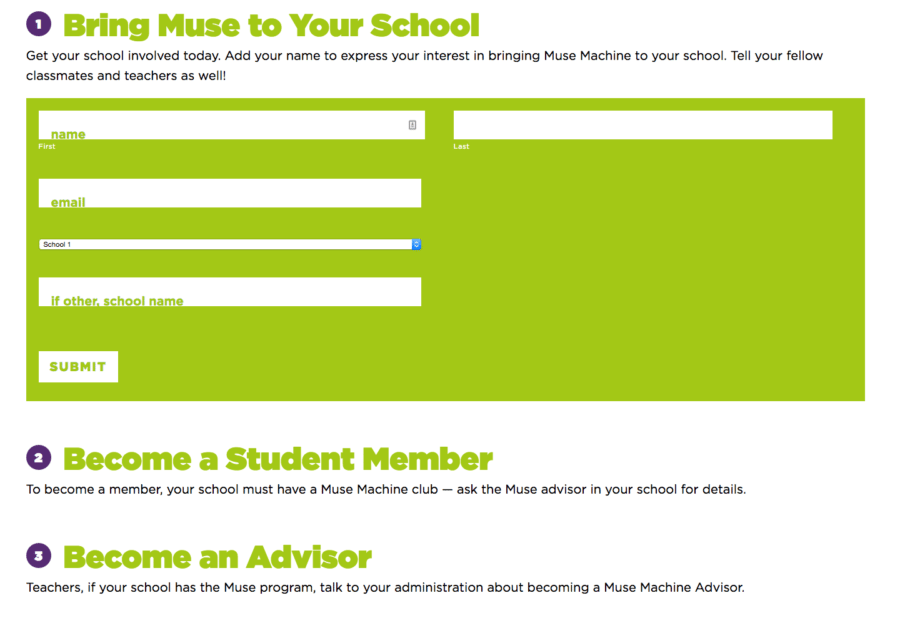
WuFoo Forms
When logged into WuFoo Forms, be sure the theme is set to ‘Muse Form Theme.’ A sample form title ‘Test Form – Ligature’ has been created.
In the Form Manager area of WuFoo, hover over the form you’d like to display on the website and click the Share button. Click the Embed on WordPress tab. Copy this shortcode and paste it into the text editor within WordPress.
Some Form Fields require additional CSS classes to ensure proper styling. These styles can be added where it says ‘ADD CSS Layout Keywords’ directly in the WuFoo form. Below are the field typesand their corresponding css class (in bold below):
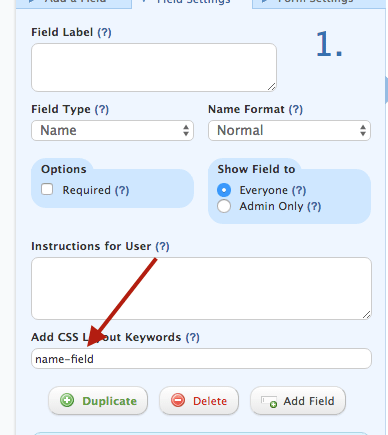
- Name: name-field
- In addition to adding the above class, please also remove the Field Label listed under name.
- Dropdowns: select-option
- Time: hideSeconds
If the field styles are not appearing correctly, please login to WuFoo Forms and use the form called ‘Test Form – Ligature’ as a guide. This should have all form fields and styles displayed correctly.
